
6 Professional Tips for Bead Stringing Tension
Table of Contents
Why Bead Stringing Tension Decides Whether a Piece Sells or Sits
Tip 1: Match the Hole and the String Before You Thread a Single Bead
Why Hole Size Sets the Tension Ceiling
Tip 2: Choose the Right Stringing Material for the Bead Weight and Drape
Tip 3: How Tight to String Beads (The Push-and-Slide Test)
Tip 4: How to String Beads Evenly Across the Whole Strand
Tip 5: Fix Loose Bead Stringing Before You Finish the Clasp
Tip 6: The Bead Stringing Tools That Actually Control Tension
A Quick Tension Troubleshooting Checklist
Conclusion: Tension Is a Skill You Can Test, Not Guess
Frequently Asked Questions
Last Updated: October 19, 2026
Why Bead Stringing Tension Decides Whether a Piece Sells or Sits
Bead stringing tension is the amount of slack or pull held along a strand, and it decides whether a finished piece drapes like jewelry or hangs like hardware. A loose strand kinks and shows gaps between beads. An overly tight strand refuses to curve, and it strains every hole it passes through. Neither result photographs well, and neither survives daily wear. Below, we'll show you exactly how to control tension at every stage, from matching hole size to stringing material to the final crimp, using the same checks we apply to our own briolette, rondelle, and marquise strands.
Tip 1: Match the Hole and the String Before You Thread a Single Bead
Tension problems usually start before the first bead goes on. If the string is too thick for the bead holes, beads jam and the strand fights you. If it's too thin, beads slide freely and the finished piece loses its shape. The fix is a fit check, not a guess.
Why Hole Size Sets the Tension Ceiling
Hole size and shape cap how much control you can achieve. A wide hole on a thin wire gives beads room to shift, so gaps appear no matter how carefully you pull. A tight hole on thick wire locks beads in place, but the strand turns stiff and the wire abrades against the hole edge. Match the hole and the string first, and every later tension decision gets easier. When you buy gemstone beads, consistent drilling matters as much as the stone itself.
Pro Tip Run your string through the hole twice before committing. If it passes twice with a little room to spare, the fit is right. If it barely passes once, the string is too thick and your strand will kink.
Tip 2: Choose the Right Stringing Material for the Bead Weight and Drape
Stringing material determines how much tension the strand can hold and how the finished piece moves. Heavy stone beads need a stronger wire or cord that resists stretching. The Fire Mountain Gems guide to bead stringing resources makes the same point: stringing material should suit bead weight and type, not whatever happens to be in the drawer.
Most tension advice treats every project the same, but tension behaves differently by material. Use this breakdown to set your target before you thread:
Beading wire (nylon-coated steel): Holds a firm, low-stretch tension and is the best choice for heavy gemstone strands. Because it resists stretching, the tension you set at the first bead stays close to the tension at the last. The trade-off is stiffness: too much pull and the strand won't drape. Aim for beads that slide with slight resistance, not beads locked in place.
Thread (silk, nylon, or conditioned polyester): Stretches slightly under pull, so tension drifts as you work. Condition the thread before stringing to reduce fraying and stretch, and recheck tension every few inches. Thread suits seed beads and lightweight designs where a soft drape matters more than rigidity.
Elastic cord: Stretches by design, so "tension" means the resting length, not a tight pull. String elastic looser than you think: a strand that looks slightly slack on the board will tighten when worn. Overstretching elastic while stringing shortens its life and causes the strand to sag later.
Knotted cord (leather, waxed cotton, silk): Tension lives in the knots, not the cord. Pull each knot to a consistent firmness and leave a little movement in the bead so the cord can flex without abrading against the hole edge.
For seed beads, thread size matters just as much. A commonly cited rule recommends Size D thread for size 11/0 seed beads and Size AA for size 15/0 beads, lightly coated with thread conditioner before stringing. For knotted designs, the cord should pass through each bead hole twice and still let the bead move freely.
Key Takeaway Match the tension target to the material: firm and low-stretch for wire, rechecked often for thread, deliberately loose for elastic, and knot-consistent for cord. The same pull that suits beading wire will ruin an elastic strand.
Tip 3: How Tight to String Beads (The Push-and-Slide Test)
How tight to string beads comes down to one test: strung beads should slide with slight resistance but never rattle. Push a bead gently along the strand. It should move about the width of a fingernail, then stop. If it slides freely, the strand is loose.

Run this check every few inches, not just at the end. Tension drifts as you work, especially on long strands, and catching it early is easier than reworking a finished piece. Hold the strand up by one end and look for gaps between beads.
Tip 4: How to String Beads Evenly Across the Whole Strand
Stringing beads evenly means keeping the same tension from the first bead to the last. Most makers start tight and loosen up as their hands tire, which produces a strand that hangs crooked. Work in short sections: string a few inches, run the push-and-slide test, then continue.
Keep the strand supported as you work. Letting a half-finished strand hang from the spool pulls the wire and stretches it, so later beads sit looser than earlier ones. Lay the strand flat on your work surface between passes. If you're alternating bead sizes or mixing rondelle and marquise shapes, check the pattern alignment as you go, because uneven tension shows up first where the bead sizes change.
Tip 5: Fix Loose Bead Stringing Before You Finish the Clasp
Loose bead stringing is easier to fix than it looks, but only if you catch it before the clasp goes on. Once the piece is closed, correcting tension means cutting it apart. Before finishing, hold the strand up and check for three things: gaps between beads, a strand that won't hold a curve, and beads that slide in clusters.
If you find slack, restring the loose section with a slightly firmer pull rather than pulling the whole strand tighter. For knotted designs, tighten the knots between beads rather than the cord itself.
Watch Out Crimping over a loose strand locks the slack in permanently. Test tension first, then crimp. Cutting apart a finished piece costs you the crimp, the wire, and sometimes the beads.
Tip 6: The Bead Stringing Tools That Actually Control Tension
The right bead stringing tools do more for consistent tension than any technique, but only if you know which tension problem each one solves. A bead-threading needle keeps small beads aligned and reduces hand fatigue that causes uneven pull. For knotted work, a dedicated knotting tool helps place knots evenly between beads, which is where tension control lives in pearl and knotted designs.
Here is how the core tools map to tension outcomes:
Bead-threading needle: Holds small beads in line so you can load several at once without pinching the string, which reduces the hand fatigue that makes your pull loosen toward the end of a strand.
Flush cutters: A clean cut on beading wire prevents a frayed end from catching in a bead hole and forcing you to over-pull to seat the bead.
Crimp pliers (two-step): A proper crimp holds the tension you set. Using flat-nose pliers instead of crimp pliers often leaves a loose crimp that lets the strand relax after finishing.
Bead stopper or clamshell bead tip: Holds beads in place while you work so the strand doesn't slide off the wire and force you to restart with uneven tension.
Knotting tool: Places knots at a consistent firmness between beads, which is the tension control point in knotted pearl and gemstone designs.
Beadaholique's guide to bead stringing basics covers the foundational techniques these tools support, and it's worth reading before you invest in equipment.
A Quick Tension Troubleshooting Checklist
Use this checklist before you crimp. Each symptom points to a specific correction, so you fix the cause rather than pulling harder.
String passes through each bead hole with slight room to spare
Bead slides about a fingernail's width when pushed, then stops
No daylight visible between beads on a hanging strand
Strand holds a gentle curve without kinking
Tension checked every few inches, not just at the end
Strand supported flat between passes, never left hanging
Final tension test done before crimping
Problem | Likely Cause | Fix |
Gaps between beads | String too thin for holes | Step up wire gauge or add a knot |
Strand won't curve | Overly tight tension | Restring with slight slack |
Beads slide in clusters | Loose tension in one section | Restring that section only |
Uneven drape | Tension drift while working | Check every few inches |
Broken beads at holes | Wire too thick for hole | Match hole and string |
Strand sags after finishing | Loose crimp or stretched elastic | Re-crimp with crimp pliers or restring elastic looser |
Beads abrade the string | Sharp or irregular hole edges | Ream the hole or switch to a thinner, smoother string |
Watch Out A tool can't fix a tension mistake it didn't cause. If beads slide in clusters, the problem is a loose section, not a missing gadget. Diagnose the symptom first, then reach for the tool that corrects it.
Conclusion: Tension Is a Skill You Can Test, Not Guess
Tension isn't a talent some makers have and others don't. It's a skill you build through the push-and-slide test, a consistent fit check, and the discipline to verify before you crimp. Every strand you finish with even tension teaches your hands what correct feels like.
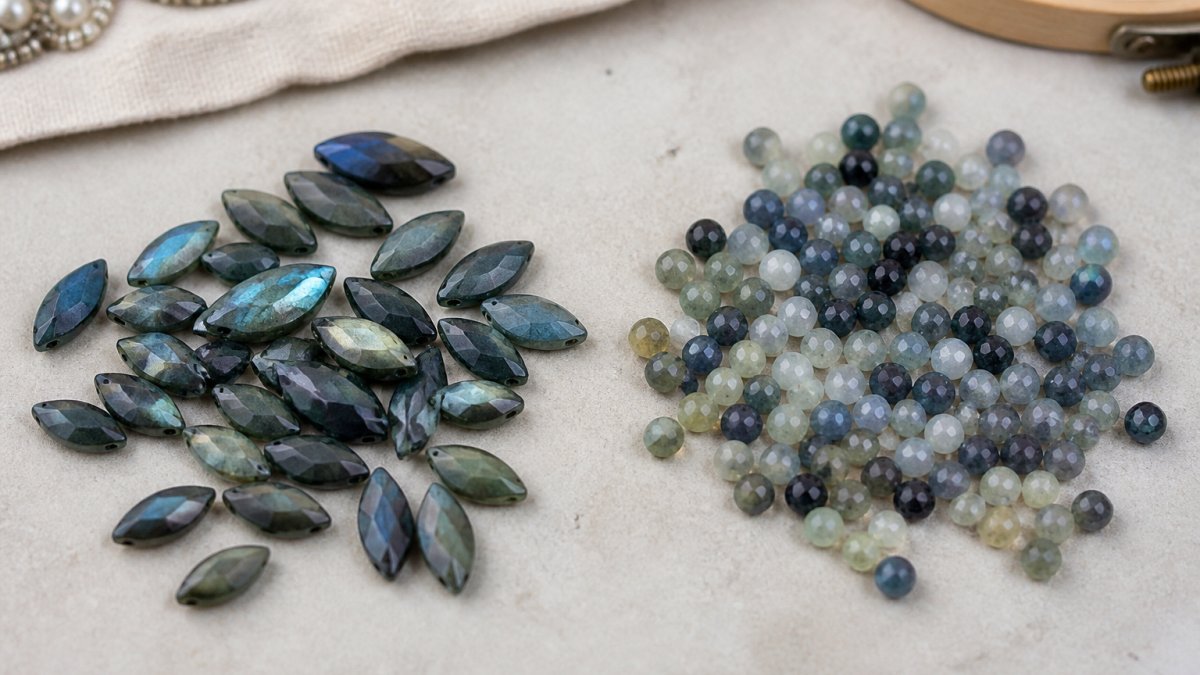
At HietalaJewelry, we stock natural gemstone beads in briolette, rondelle, and marquise cuts, from lapis lazuli to amethyst and sapphire, with consistent drilling that makes tension control easier from the first bead. Our sale pricing and free delivery within the USA keep premium materials within reach. Browse our gemstone beads and start your next strand with stones that hold their tension as well as their color.
Frequently Asked Questions
How tight should tension be when stringing beads?
Tight enough that beads hold their position when you lift the strand, but loose enough that each bead can still rotate and slide a little with a light push. A strand strung with proper bead stringing tension drapes in a soft curve instead of standing stiff. Test it before you crimp: hang the strand from one end and look for gaps between beads. If you see daylight between them, the tension is too loose; if the strand arcs like a wire, it is too tight.
How do you keep bead stringing tension even across a whole strand?
Work in short sections of 10 to 15 beads, sliding each new bead snug against the previous one before adding the next. Keep the working end of the stringing wire under light, constant pull rather than yanking it tight at the end. When you switch bead sizes or shapes, such as moving from rondelle to briolette cuts, recheck tension at the transition. Consistent hand position and a bead threading needle both help keep the pull identical from bead to bead.
Why does my beaded strand look loose between the beads?
Loose bead stringing usually comes from three causes: stringing material that is too thin for the bead holes, stretching cord such as nylon that relaxes after wear, or finishing the clasp before the strand has been tensioned along its full length. Beading wire with a larger diameter, or a doubled pass of thread, fills the hole better. Pull the strand gently from both ends before crimping, and check that no bead can slide more than a hair's width.
What are the essential bead stringing tools for controlling tension?
A bead threading needle stiffens the working end so you can pull with steady force. Crimping pliers give a clean, flat crimp that holds the finished tension. Round-nose and chain-nose pliers handle the clasp. None of these tools replaces the push-and-slide test, but together they make even tension repeatable across a production run.
How do you fix beads that are strung too tightly?
Cut the strand back to the last crimp or knot, remove the beads from the over-tightened section, and restring with a lighter pull. If the design uses beading wire, switch to a smaller diameter or a more flexible material so the strand can curve. For a finished piece that already feels stiff, redo the finishing end rather than forcing the beads to move. Overly tight tension stresses bead holes and accelerates breakage, so it is worth the extra restringing time.
Read more

Comments